- Get link
- X
- Other Apps
Your Guide to the Social Media Jungle
3 Easy Ways to Create Instagram Ads
 Wondering how to easily create Instagram ads?
In this article, you’ll discover three easy ways to create Instagram ads.
#1: Promote an Instagram Post With the Instagram App
If you have an Instagram business account, you can create promotions with the Instagram app to boost the visibility of a post on your profile.
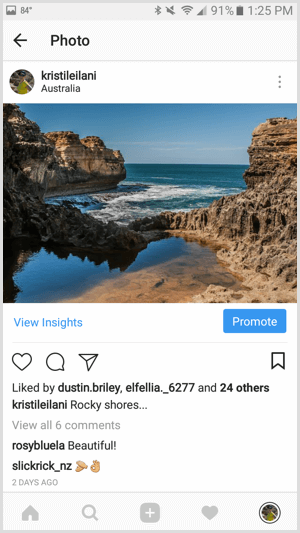
Choose a Post to Promote
To get started, navigate to your profile and select the post you want to promote. Then tap the Promote button on the post page.
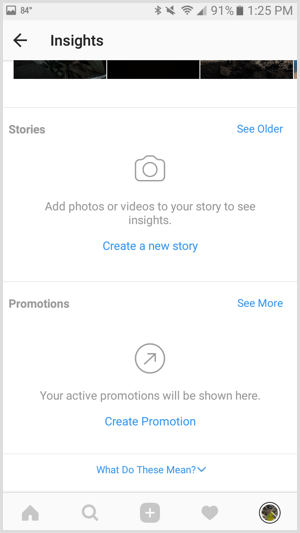
Alternatively, you can go to your Instagram Insights, scroll to the Promotions data, and tap the Create Promotion link.
Select the post you want to promote and then tap the arrow at the top right.
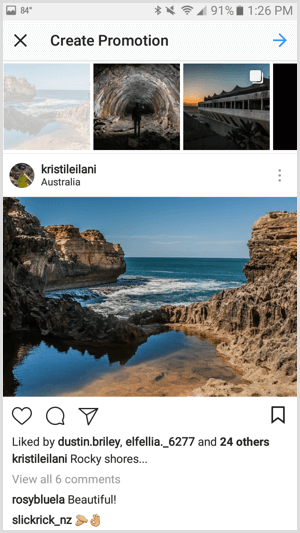
Configure the Objective and Action Button
Instagram lets you choose from several objectives for your promotion. You can direct your target audience to visit your website, view your profile, get directions to a specific address, or call the phone number listed on your business account.
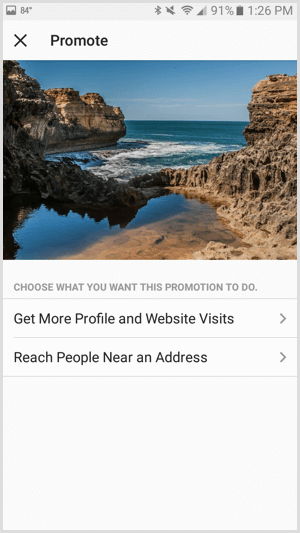
To direct your target audience to visit your website or view your Instagram profile, choose Get More Profile and Website Visits. On the following screen, tap on Destination to enter your website address or choose your profile.
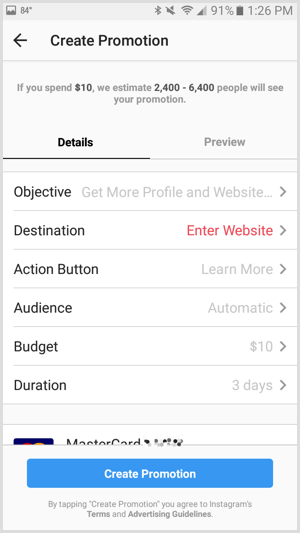
Enter the website URL you want your target audience to visit or choose your business profile.
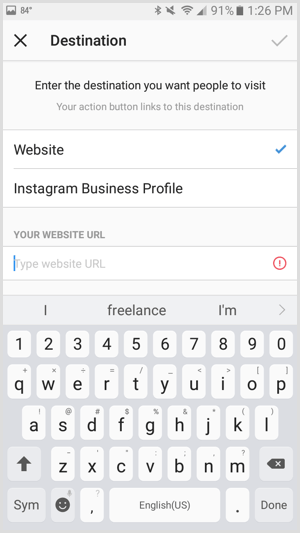
If you enter a website URL, you can choose from the following action buttons.
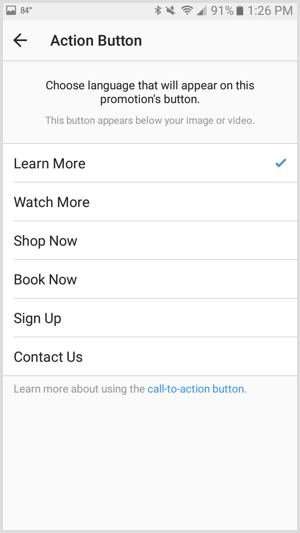
To direct your target audience to get directions to a specific address or call the phone number on your business account, choose Reach People Near an Address. On the following screen, tap Select Button Text for the action button.
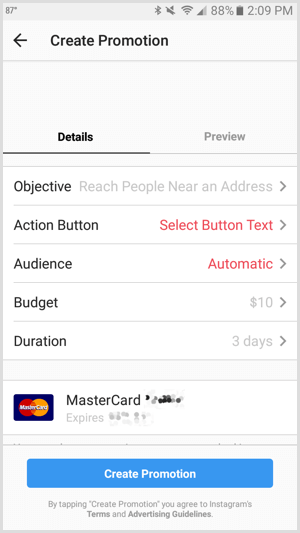
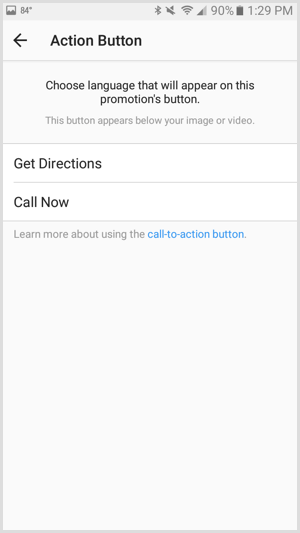
Choose to give your target audience directions to a specific address or the option to call the number on your Instagram business account.
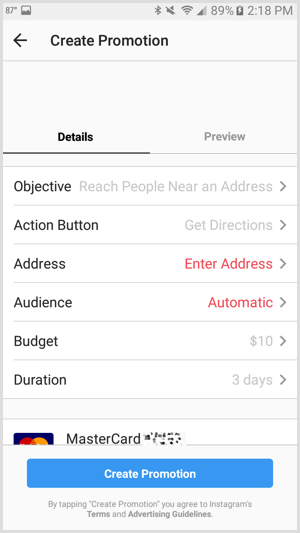
If you choose to offer directions, you’ll need to add your location’s address.
Define a Target Audience
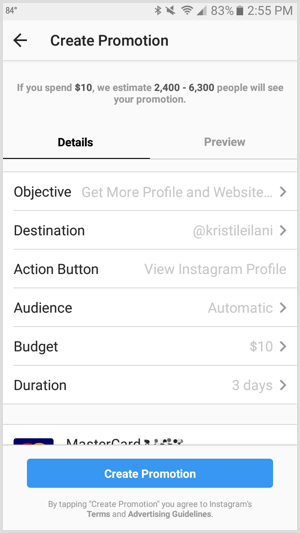
Once you’ve saved your objective and action button, tap on Automatic for Audience to create a target audience for your promotion.
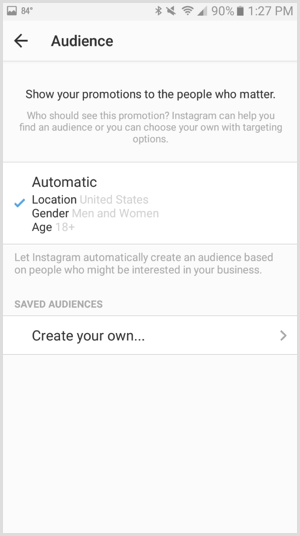
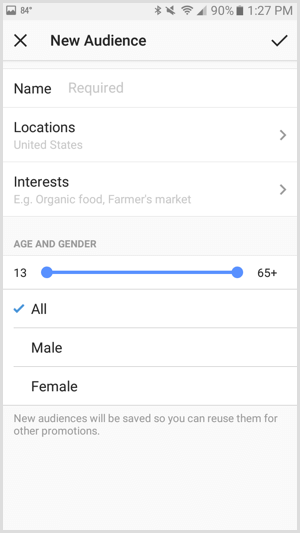
You can define your target audience by multiple locations, up to 10 interests, age, and gender.
Set a Budget and Duration
To set the budget and duration for your promotion, tap on either the default budget or duration.
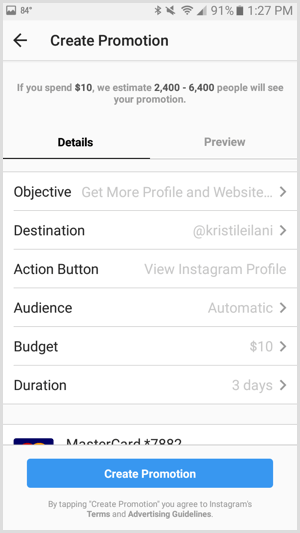
You can select a total budget for the entire Instagram promotion, as well as any duration that spends at least $1 of your budget per day.
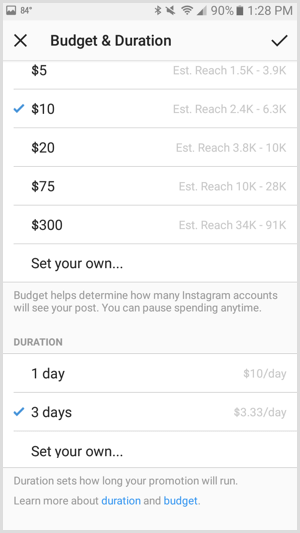
When you finish setting up your promotion and entering your payment information, you can tap the Preview tab to see your promotion as your target audience will. To submit it for review, tap the Create Promotion button at the bottom of your screen.
View Insights
After your promotion has been approved, Insights will collect stats about your promotion within a few hours. To view them, select the post you promoted on your profile. When you tap View Insights, you can see the insights for your promotion.
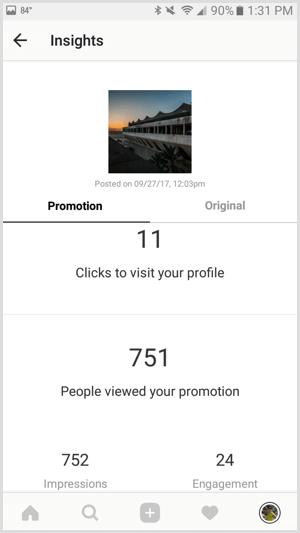
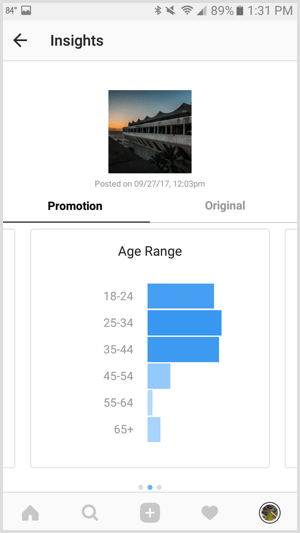
Demographics for your Instagram promotion’s performance include gender, age, and location.
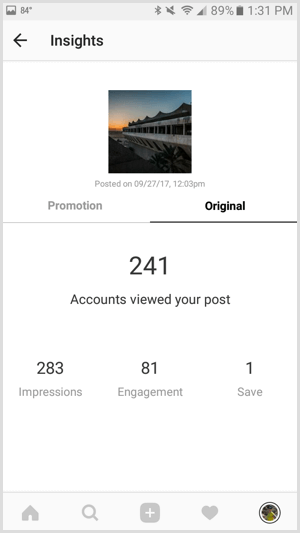
You can also tap the Original tab to see Insights for your post’s performance without Instagram promotions or ads.
#2: Create Instagram Ads for the Facebook News Feed in Facebook Ads Manager
Facebook has updated Ads Manager to include some of the best features of Power Editor so everyone can get the most out of their Facebook and Instagram ads. To create an Instagram ad in Ads Manager, use this link to choose or create ad accounts outside Business Manager, and this link to view or create ad accounts inside Business Manager.
Create a New Ad Campaign
Click the green Create Ad button at the top right of Ads Manager to create a new Instagram ad.

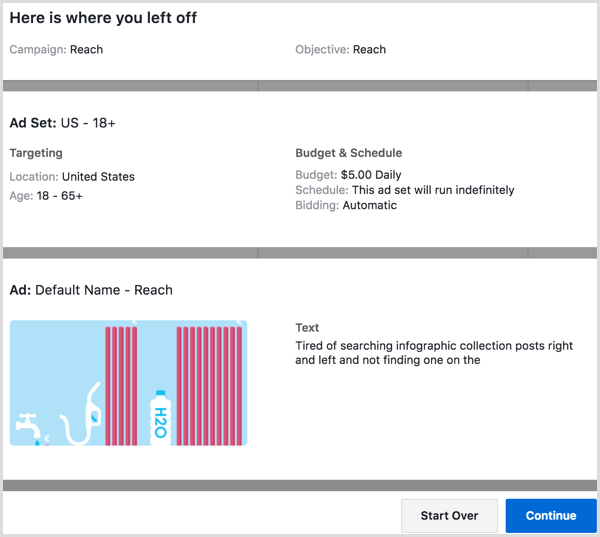
If you previously started but didn’t finish setting up a Facebook or Instagram ad, you’ll be prompted to pick up where you left off. Choose Start Over to create a new Instagram ad from scratch.
Choose an Objective
The first step is to select the marketing objective for your Instagram ad campaign.
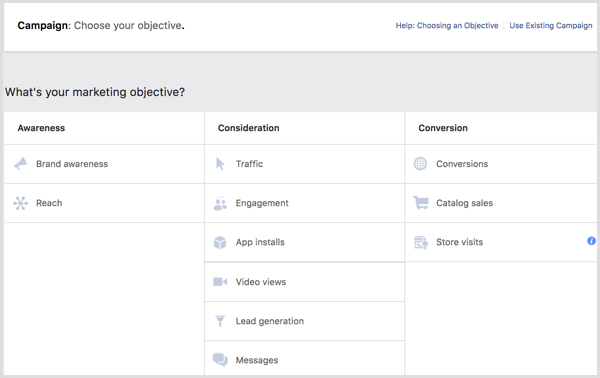
You can use the following objectives for the placement of Instagram ads in the news feed:
- Brand Awareness – Reach people more likely to pay attention to your ads and increase awareness of your brand.
- Reach – Show your ad to the maximum number of people.
- Traffic – Send more people to a destination on or off of Facebook such as a website, app, or Messenger conversation.
- Engagement – Get more people to see and engage with your Facebook page, Facebook page posts, or events (not stories).
- App Installs – Send people to the store where they can purchase your app.
- Video Views – Promote videos that show behind-the-scenes footage, product launches, or customer stories to raise awareness about your brand.
- Lead Generation – Collect lead information from people interested in your business.
- Messages – Get more people to have conversations with your business in Messenger to complete purchases, answer questions, or offer support (not stories).
- Conversions – Get people to take valuable actions on your website or app, such as adding payment info or making a purchase. Use the Facebook pixel or app events to track and measure conversions.
Name Your Campaign
After you choose your objective, you need to provide a name for your ad campaign. Choose a naming convention that will help you identify the ad in your ad insights for future reference.
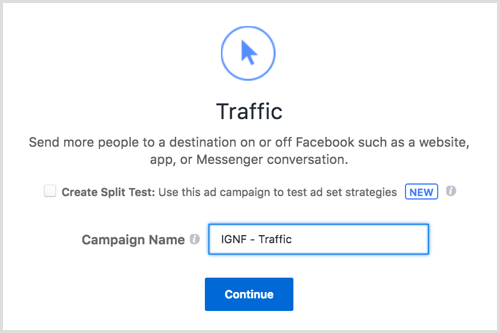
Create a Split Test (Optional)
If you want to split test throughout your campaign, check the box for Create Split Test. You can set up a split test for different creatives, delivery optimization settings, target audiences, or placements. The ad sets will be identical except for the variable you want to test, and you’ll get an email and notification with the results when the test is over.
Once you’ve named your campaign and checked the split test box if applicable, click Continue.
Choose Your Destination
Depending on the objective you selected, choose the destination your target audience should reach when tapping on your Instagram ad.

Create an Offer (Optional)
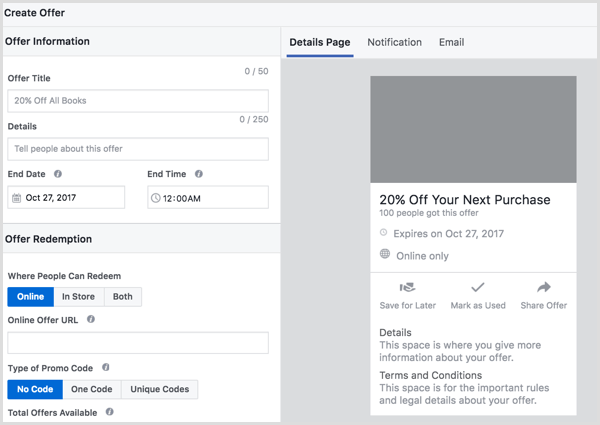
Some objectives, like traffic to your website, allow you to create an offer. To do this, toggle the switch in the Offer box to on, select your Facebook page, and click Create Offer.
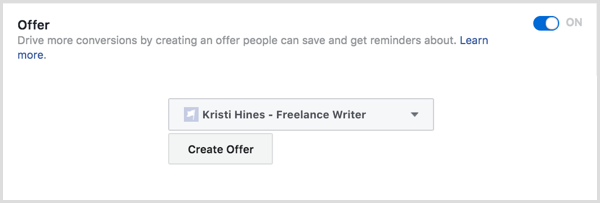
On the following screen, configure your offer and click Create to finish.
Select a Variable for Split Testing
If you checked the box to create a split test, you’ll need to choose the testing variable.
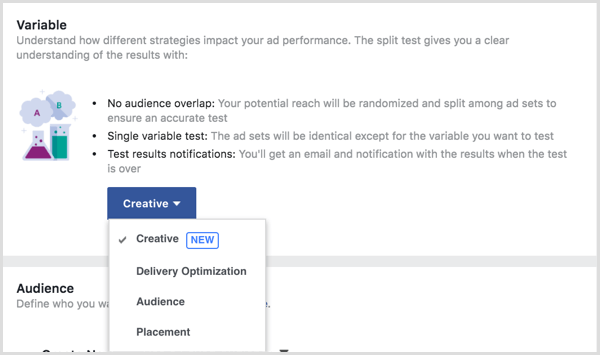
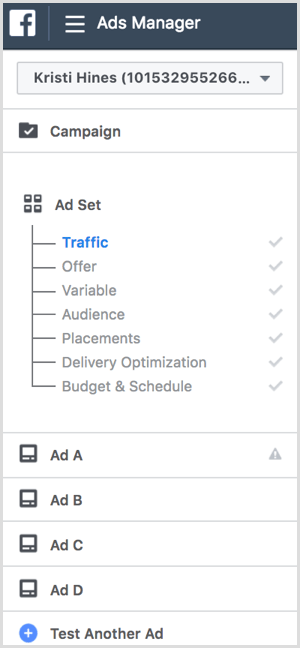
Select Creative to test up to five different ad creatives, which appear in the Ads Manager left sidebar menu.
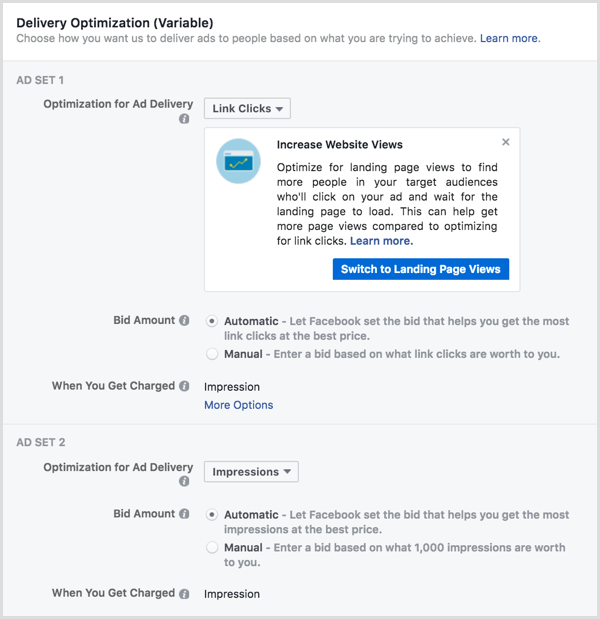
Choose Delivery Optimization to test up to five different ad sets with different delivery optimization options.
Choose Audience to test up to five different ad sets with different target audiences.
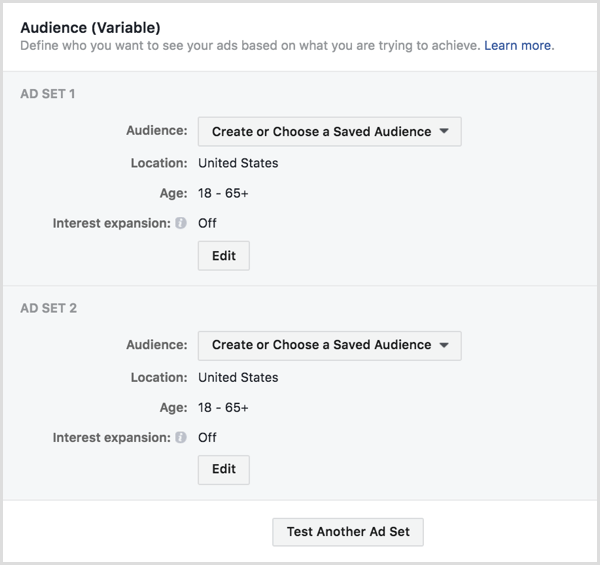
Click the Edit button under each ad set to see the full Audience targeting options, including the ability to select from your custom audiences.
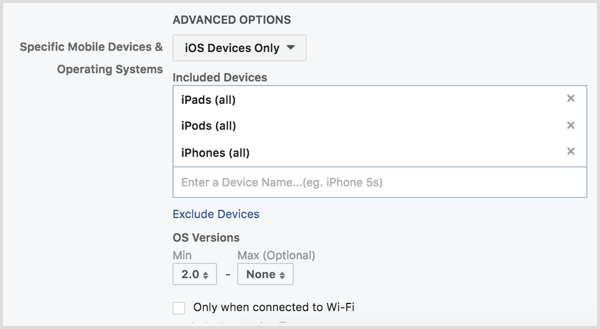
Choose Placement to test up to five different ad sets with different placements. For Instagram ads, you can see how an ad in the news feed performs compared to an ad in Stories. You can also split test Instagram ads in the news feed by device (iPhone vs. iPad) or operating system (iOS vs. Android).
Define Your Target Audience
In the Audience section, define the target audience for your Instagram ad.
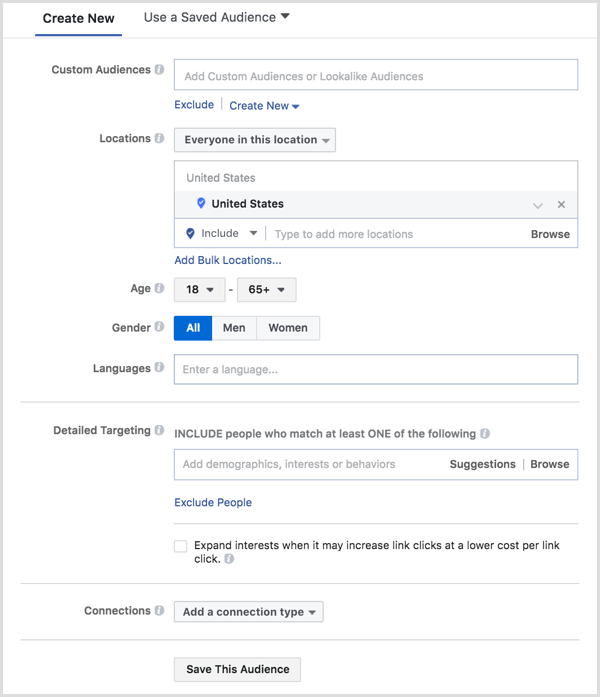
From this screen, click Use a Saved Audience to select a saved audience from previous ad campaigns. If you don’t have any saved audiences, you can use the options under Create New to define your target audience.
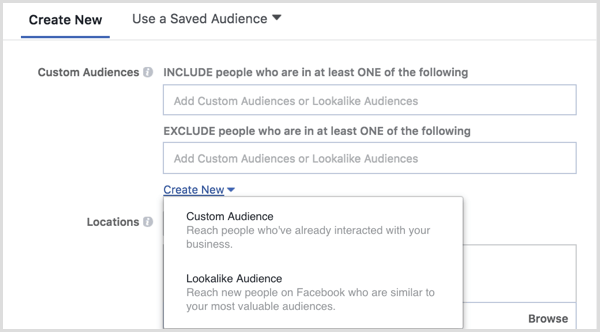
If you’ve created custom audiences from a customer file (database or email list), website traffic using the Facebook pixel, app activity, offline activity, or engagement with your Facebook page or Instagram profile, you can select custom audiences to include or exclude in your target audience.
Click the Create New drop-down menu in the Custom Audience section to create a new custom audience or lookalike audience on the spot from your customer audiences. Note that Facebook Ads Manager may take a while to process some custom audience options (like the customer file) so you want to do this in advance if you plan to launch your Instagram ad campaign immediately.
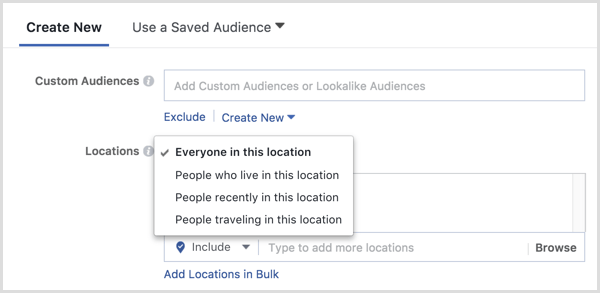
After you’ve selected, created, or skipped custom or lookalike audiences, you can further define your target audience by general demographics. Use the drop-down menu next to Locations and select an option to refine your location targeting. Your options are choose everyone, people who live in, people who have recently been to, or people traveling in a specific location.
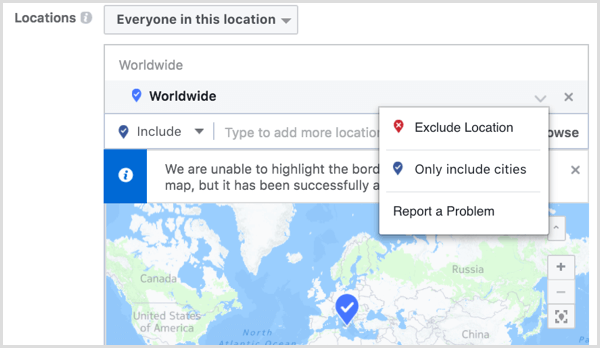
If you want to choose major cities across the globe, click on Worldwide. To choose cities within a specific country, click on that country and select Only Include Cities from the drop-down arrow that appears.
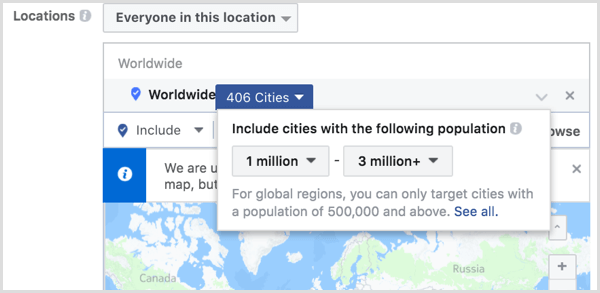
You can then click on the number of cities and filter them by population size, allowing you to target either smaller cities or larger metropolises.
Under Detailed Targeting, define your target audience by additional demographics, interests, behaviors, and Facebook-specific activities.

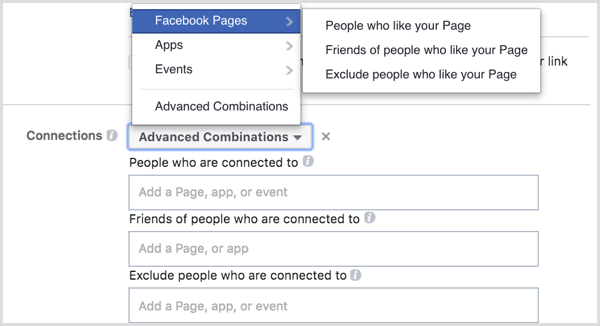
In Connections, define your target audience based on whether they’ve engaged with your Facebook pages, apps, or events.
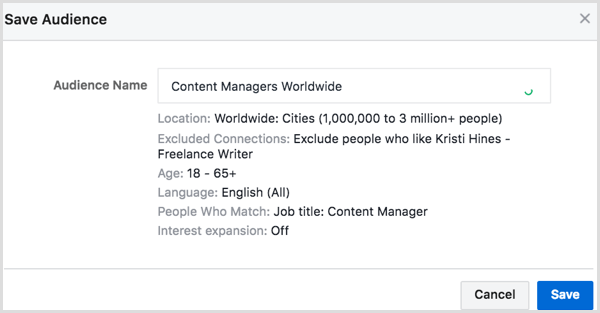
Once you’ve finished defining your audience, click the Save Audience button at the bottom to save your target audience for future use in ad campaigns.
Select Placements
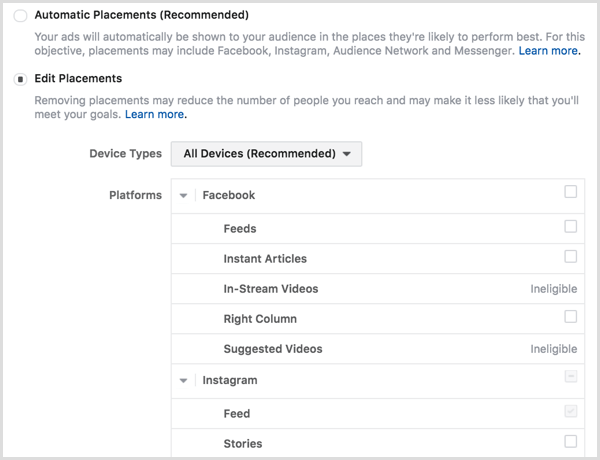
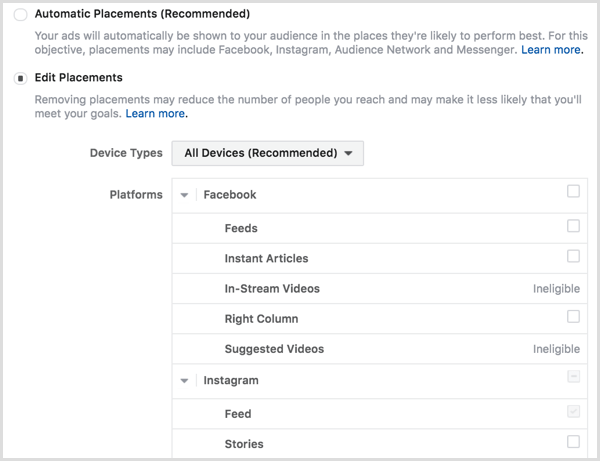
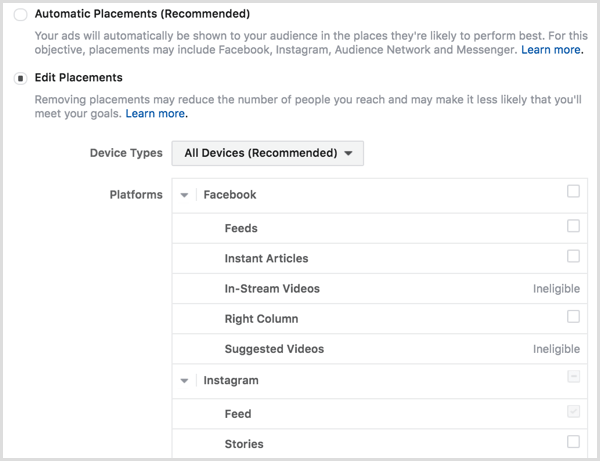
For Instagram ads in the news feed, switch from Automatic to Edit Placements to select Instagram ads in the feed.
Set Up Delivery Optimization
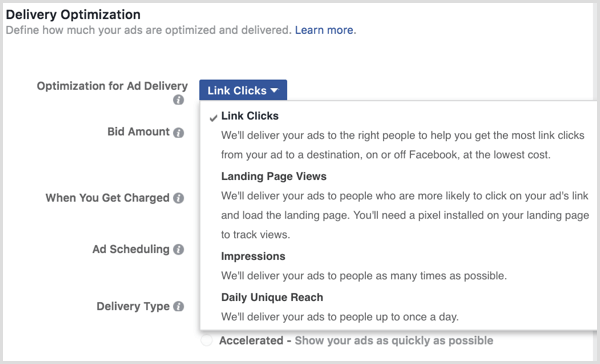
The Delivery Optimization section allows you to configure ad delivery details relevant to the marketing objective you chose for your Instagram ad campaign, starting with Optimization for Ad Delivery. This lets you tell Facebook the results you want.
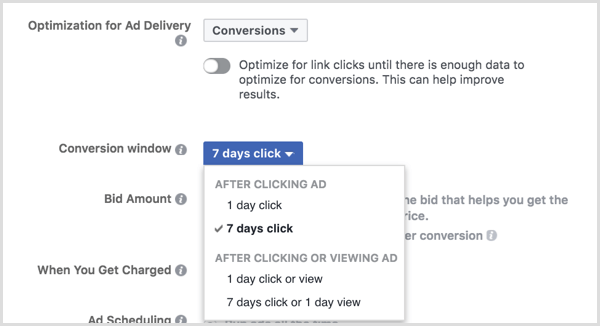
If you see the Conversions option for your Optimization for Ad Delivery, you get to choose a conversion window from the time someone views or clicks on your ad until the time they complete your chosen conversion goal, such as making a purchase or signing up for your email list.
Bid Amount allows you to tell Facebook how much you’re willing to pay to get the results you want from your ad (the number of link clicks, landing page views, impressions, or reach). You can choose to let Facebook set the bid amount, giving you a better chance to beat the competition, or set a specific amount so you don’t spend more than a certain amount per result.
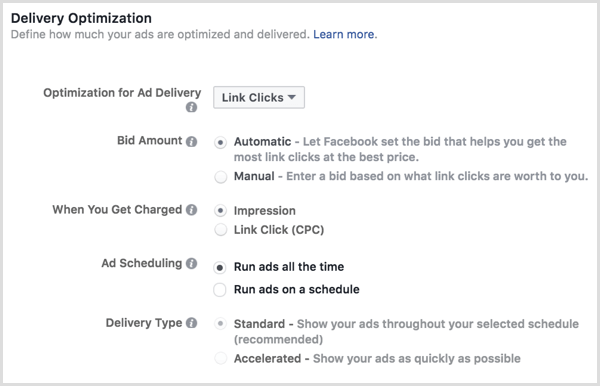
When You Get Charged allows you to select whether you will be charged per impression (each time your ad appears in your target audience’s news feed) or per click (each time your ad is clicked).
With Ad Scheduling, you can choose when an ad is shown to your target audience based on their time zone or the time zone selected in your ad account.
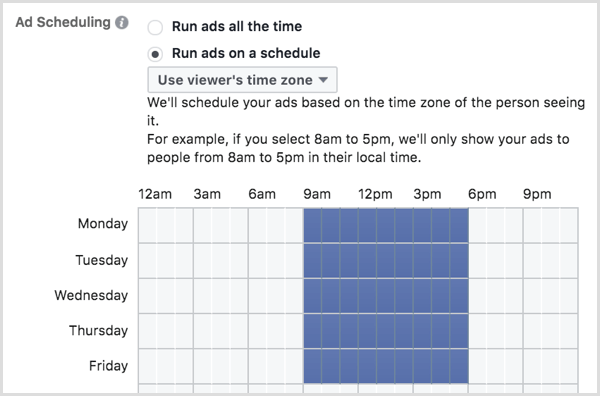
If your ad campaign is time-sensitive and you’ve chosen a manual bid amount, you can change the Delivery Type option for your ad campaign from standard to accelerated, with the noted caveats below.

Set a Budget and Schedule
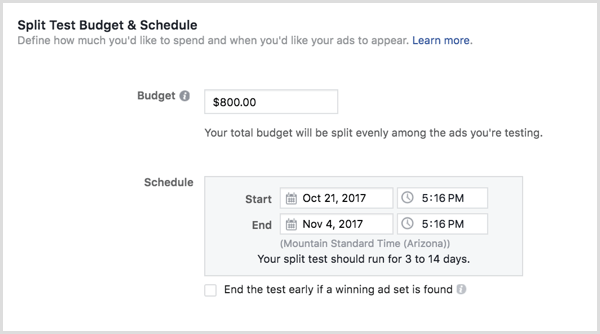
Next, set your total ad campaign budget and the date range you want your ads to run. If you’re running split tests, you can also check the box to end the test early if a winning ad set surfaces among your creative, delivery optimization, audience, or placement variables.
Select an Ad Identity
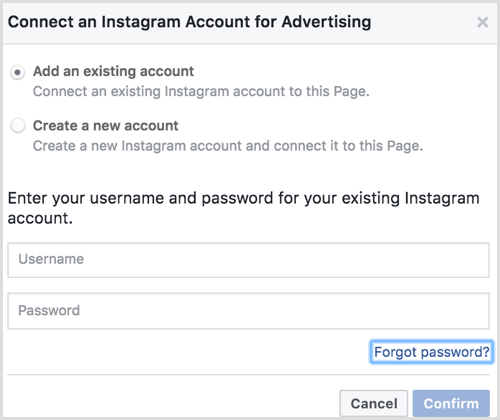
To start on your ad creative, name your ad and choose the associated Facebook page and Instagram account you want linked to your ad. If you haven’t associated an Instagram account with your Facebook page, click the Add an Account button.
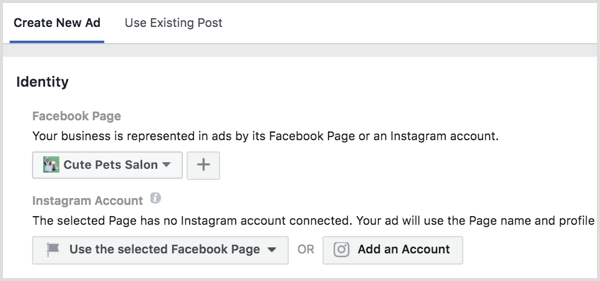
This option lets you log into an existing Instagram account or create a new Instagram account to link to your Facebook page. Note that you’re only required to have a Facebook page to create an Instagram ad, but if you’re going to advertise on Instagram, it makes sense to have an Instagram profile for ad visitors to follow as well.
Choose an Ad Format
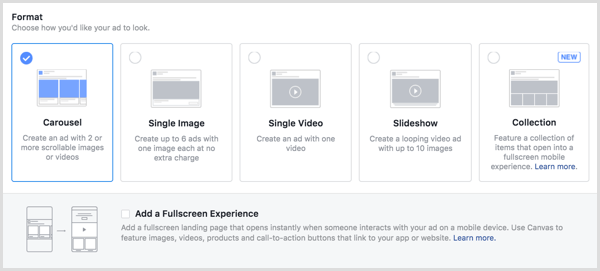
Depending on the marketing objective you selected for your Instagram ad campaign, you can choose from the following ad formats for your Instagram ad in the news feed: Carousel, Single Image, Single Video, Slideshow, or Collection.
For most ad formats, you can select Add a Full-Screen Experience to turn your news feed ad into a more robust experience with Canvas.
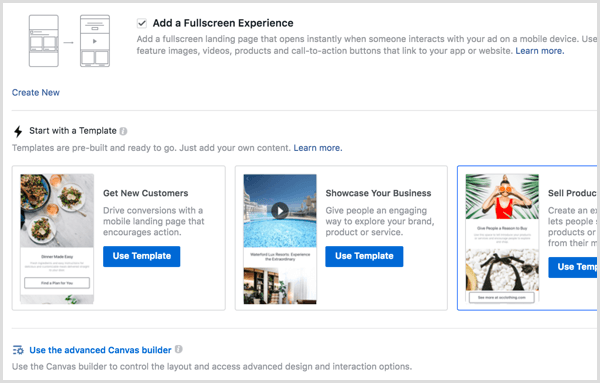
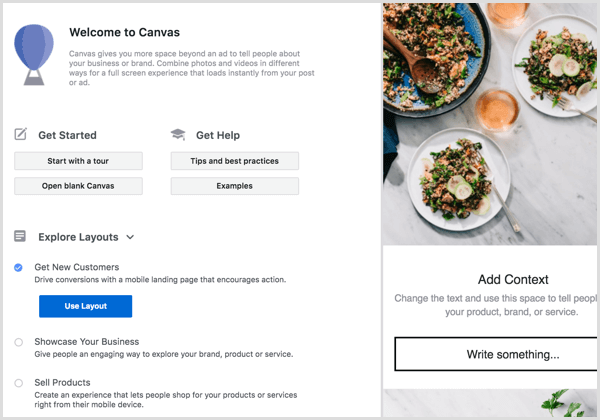
If you choose a full-screen experience, you can use a pre-built template or click on the advanced Canvas builder to customize your own design.
If you don’t choose the full-screen experience, you’ll be prompted to add images or video based on the ad format you select. You’ll get the recommended specs for images…
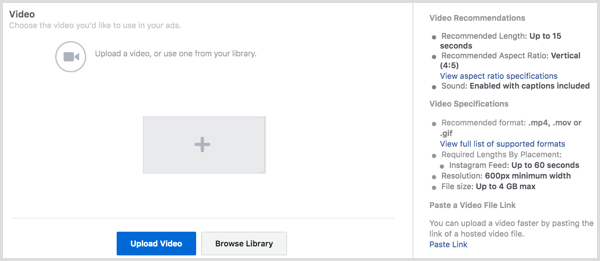
…as well as the recommended specs for videos.
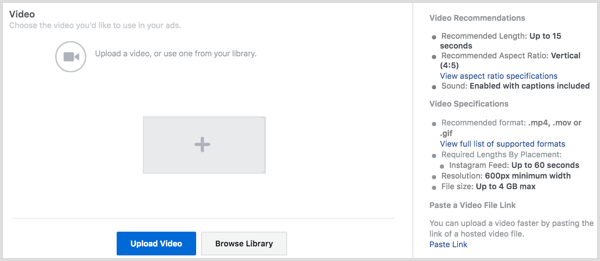
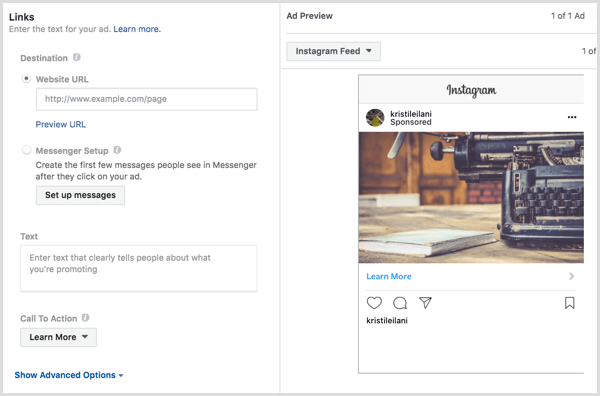
Based on your chosen marketing objective for your campaign and ad format, configure the destination, call to action, and text for your ad.
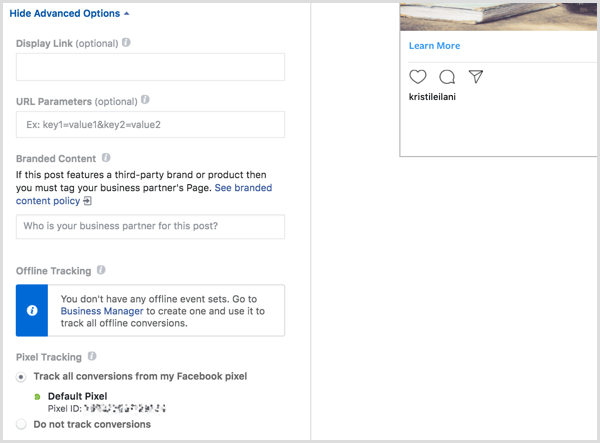
Click Advanced Options to configure optional items for your ad including a display link, URL parameters for tracking purposes, Branded Content partners, offline tracking, and conversion tracking.
Confirm Your Ad
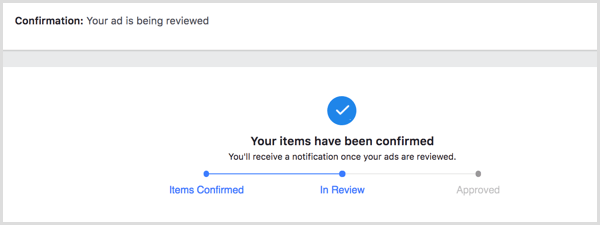
Once you’ve completed setting up your campaign and ad creatives, click the green Confirm button to submit your ad for review. If you’ve configured everything correctly, you should see the following.
#3: Create Instagram Stories Ads in Facebook Ads Manager
The steps for creating an ad for Instagram Stories in Facebook Ads Manager are similar to those above, with the following exceptions.
Choose an Objective
You can choose from the following objectives for the placement of Instagram ads in Stories:
- Brand Awareness – Reach people more likely to pay attention to your ads and increase awareness of your brand.
- Reach – Show your ad to the maximum number of people.
- Traffic – Send more people to a destination on or off of Facebook such as a website, app, or Messenger conversation.
- App Installs – Send people to the store where they can purchase your app.
- Video Views – Promote videos that show behind-the-scenes footage, product launches, or customer stories to raise awareness about your brand.
- Lead Generation – Collect lead information from people interested in your business.
- Conversions – Get people to take valuable actions on your website or app, such as adding payment info or making a purchase. Use the Facebook pixel or app events to track and measure conversions.
Select Placements
For Instagram ads in Stories, you want to switch from Automatic to Edit Placements to select Instagram ads in the feed.
Choose an Ad Format
Depending on the marketing objective you chose for your campaign, you may have the following ad formats available for your Stories ad.
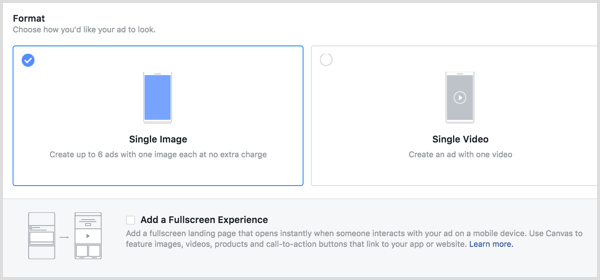
For either of these ad formats, you can also add a full-screen experience to turn your Stories ad into a more robust experience with Canvas.
If you choose a full-screen experience, you can select a canvas you’ve already created or click the + button to launch the advanced Canvas builder to customize your own design.
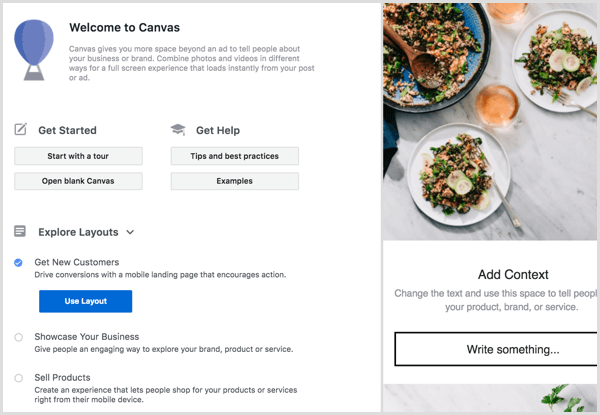
If you don’t choose the full-screen experience, you’re prompted to add images or video, based on the ad format you select. You’ll get the recommended specs for images in Stories…

…as well as videos in Stories.
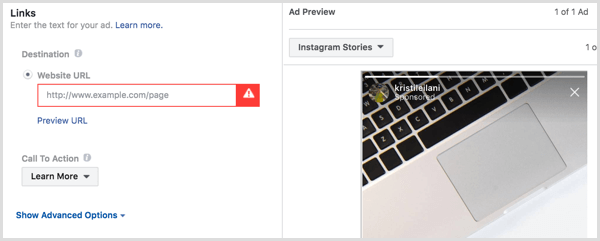
Based on your chosen marketing objective for your Instagram ad campaign and ad format, configure the destination and call to action. Because you’re creating for Instagram Stories, make sure any text you want displayed is on the image or video itself.
Monitor Your Instagram Ad Campaign
Once you’ve submitted your campaign for review, you can monitor its progress and results in the Ads Manager dashboard.
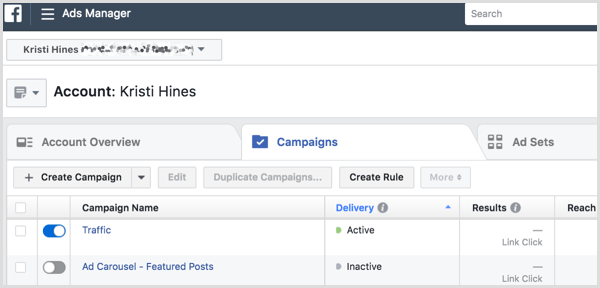
Click on the campaign name to reveal the ad sets within your campaign. There may be two or more if you created a split test.

Click on the ad set names to reveal the ads within the set. There may be two or more if you created multiple ads using different images or video.

Hover over a campaign name, ad set name, or ad name to access links to view charts, edit, or duplicate for each respective property.

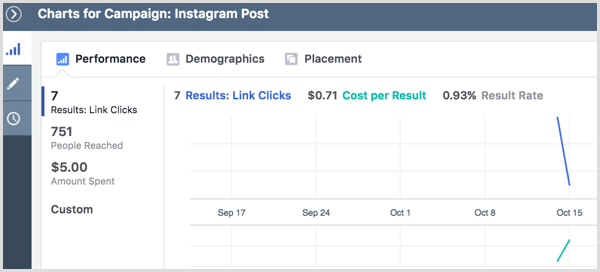
Click View Charts to see the results of your ad campaign, ad set, or ad.
Click Edit to update the details of your ad campaign, ad set, or ad.
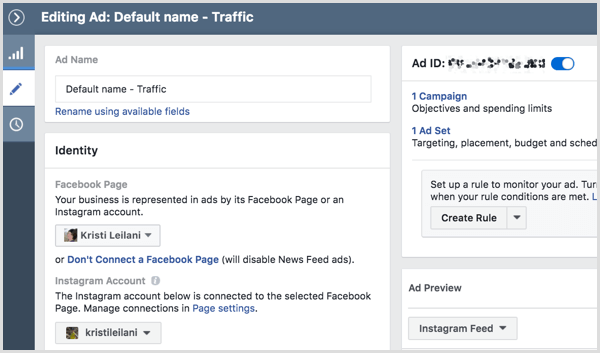
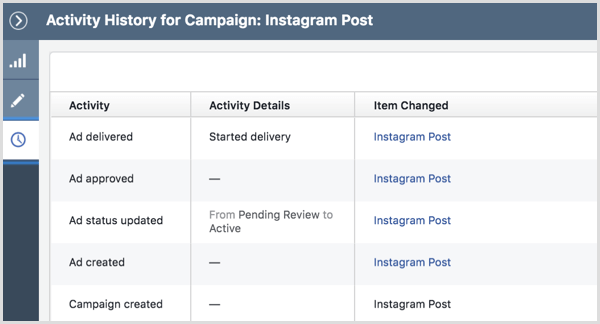
Click the clock icon to see any activity related to the ad campaign, ad set, or ad.
Click Duplicate to create a new ad campaign, ad set within your ad campaign, or ad within your ad set based on the original.

Want more like this? Explore Instagram for Business!
.
Conclusion
As you can see, the Instagram app and updated Ads Manager allow you to create Instagram ads for the news feed and Instagram Stories with precision so you can get the best results for your advertising budget
